TwinTeeth - Assembling the Drilling Toolhead
Safety first
The Drilling Toolhead uses drill and milling bits that can heart your hands or fingers. Be careful when handling it. Before using it, attach well the material that you want to process to the platform because it can get loose and go flying from the platform. The drill is an electrical device, please take the necessary safety measures when handling devices with these characteristics.
The Drilling ToolHead
This toolhead allows you to drill or mill soft materials using a Dremel rotary tool: in this case a Dremel 200 or Dremel Multi mini rotary tool. If you own any other Dremel model you will need to adapt the hexagon design and 3D print it.
To assemble this ToolHead you only need the Drilling ToolHead Hexagon 3D part, the Dremel tool and its wrench.
Review the hexagon before assembling and remove with a cutter the remains of support material, plastic chaffs, blobs, strands, threads, etc. that could be left from the 3D printing process.
TwinTeeth Plus Drilling ToolHead
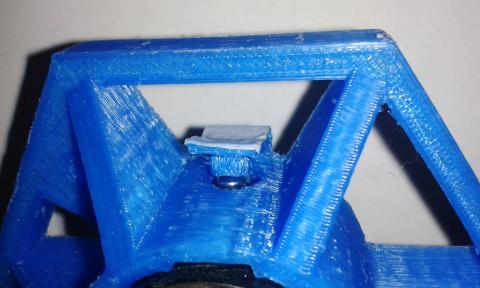
If you are assembling TwinTeeth Plus there are some changes in the process. We included a small plastic piece in the hexagon which helps you to push on the Dremel shaft locking stub. Also you will find in the kit an additional part: an overhanging edge which helps to install the ToolHead on the new aluminium triangle.
Glue a small piece of adhesive tape or plastic on the square piece (see next picture) and glue it with some drops of cyanoacrylate. This tape will act as a hinge. Let it try and then push with your finger the piece into the hole till you break it. It will remain glued to the tape and will flex enough to let you push on it to release the stub.

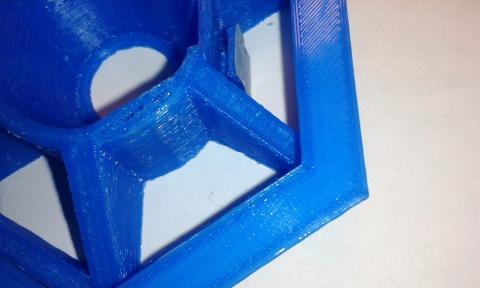
Then check that the overhanging part fit well on the hexagon. It has to stand perfectly on the top side. Use a knife or a file to adjust it if needed.

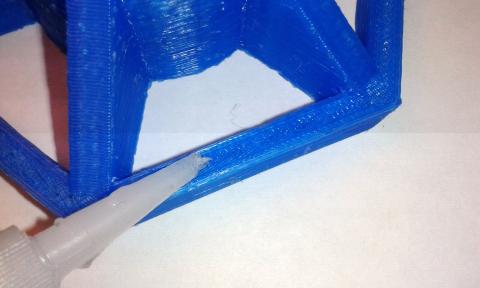
Glue it to the hexagon using cyanoacrylate.

The drilling ToolHead is finish.
If you are assembling Twinteeh Basic then using a 4mm drill bit go into the side holes of the hexagon. These are the holes for the M4 retainer bolts. TwinTeeth Plus ToolHead uses a different retaining system.
Make sure that the drill is unplugged then remove the attaching nut of the Dremel tool.
Push the stub that locks the shaft. Rotate the shaft with your hand until the stub goes down and locks it.
In that position insert the Dremel into the hexagon as shown in the following picture.
Install again the nut in the drill head.
Now you can install the drilling bit that you want to use. Lock the lug with your finger and install the bit into the chuck.
By convention, we try to install all the tools at 40mm underside the hexagon (just to avoid adjusting the camera when interchanging tools). Don't forget to tighten the chuck using the wrench.
If you are using TwinTeeth Basic and you can not press the stub with your finger you can use the wrench to do it. Also you can 3D print a small plastic part and glue it with adhesive tape in the similar way we did with TwinTeeth Plus.
The ToolHead is ready to use. You only have to install it on TwinTeeth and connect it to an electrical plug.
At this time TwinTeeth does not control it and you have to turn it on/off manually. it is very easy to design a small PCB with a relay or similar device, and connect it to the Ramps in order to controll it by software. G-code already includes commands to do it.
Calibrating the Drilling ToolHead
Calibrate the Drilling ToolHead is very easy.
First, click on the Dremel tab to select that tool and home the platorm. Put on it the PCB or material you want to process.
Using the Z control, move carefully the platform up till it will tocuh the material surface. Make sure the platform is centered.
Suggestion: first time installing a new ToolHead and moving the platform up to check the limits, go over the emergency button with the mouse in order to quickly click there and stop the robot in case something goes wrong. If you overpass the limits you could broke some plastic parts or even the pickup.
Once the platform is in that position, click on the Calibrate button.
Set the Z min slider to the thickness of the material and a little bit because drill bits usually have a round end.
Click on the Set Program Zero button to set the current location as the program zero. This information is particular to this Toolhead and is stored in EEPROM so it remains after power off.
Click again on the Calibrate button to hide the calibration controls.
Then home the platform again. Remember that every time you set a new program zero position you need to home the platform because otherwise you can not move it.
To check that it is well calibrated click on the "Goto Zero" button to go to that position. The platform will move up and stop just when the drill bit touches the PCB surface.
The Drilling Toolhead is ready.
We will learn more things about how to drill PCBs with it in following chapters.
Previous chapter Assembly Index Home Next chapter
