3D printing
In this chapter we will cover the process of 3D printing using the 3D Printing ToolHead.
The process consists on the following steps:
- Create the design
- Generate the STL file
- Slice the STL file
- Install the 3D printing Toolhead
- Set the program zero
- Feed the extruder
- Prepare the printing platform
- 3D print the object
Creating the design
You can create the 3D part with any CAD software.
All modern CAD programs generate .STL file format which is the format uses by the slicing software. Now the most popular open-source CAD programs are Freecad and Openscad.
You will also find at this site a complete list of 3D printing sofware.
Generating the STL file
When you will finish designing the part then you have to export it to the .STL file format.
You can also 3D print parts designed by other people. Just download the .STL file from any of 3D part community like YouMagine or Thingiverse.
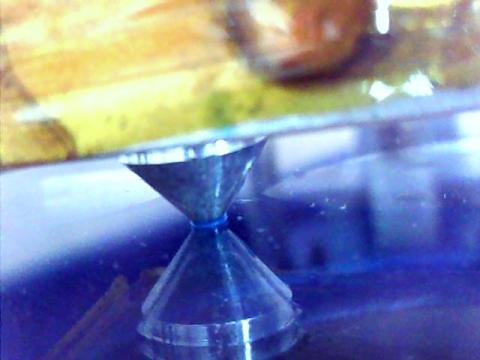
As an example we will use a small TwinTeeth 3D part: the retainer bolt knob. SKU0007_RetainerKnob.stl. You can download it from the Get it page.
Slicing the STL file
The process of slicing consists in to cut the 3D model into slices (layers) and generates printing instructions (g-code) for the 3D printer.
Most popular open-source slicers are Cura Ultimaker and Slic3r. You can use any slicer with TwinTeeth The only requirement is that it must support configuring the 0,0 position at the center of the bed.
We will use Cura in this tutorial.
Latest versions of Cura allows you to configure various machine settings. We recommend you to create a new machine setting for TwinTeeth using the following parameters:
Once created modify the printing parameters on the following way:
Configure also the following start and end g-code.
Then you can load the file: SKU0007_RetainerKnob.stl
Finally, use the Save Gcode option on File menu to generate the g-code file.
Installing the 3D Printing Toolhead
Now you can install the ToolHead on TwinTeeth. Before that, make sure that the power supply is off.
Insert the hexagon and attach it to the retainer bolts. Then connect the DB15 connector.
If you want to use the filament spool holder, install it as we already described in Assemblling the 3D printing ToolHead chapter.
Setting the program zero
Turn the power supply on, run TwinTeethMC and connect to the robot.
Click on the 3D printer tab.
Using the Z control move carefully the platform till the hot-end tip touch the glass. Then move the platform 0.1mm down because the extruder needs some gap between to hot-end tip and the glass. It allows first layer of plastic flows out.

Once the platform is there, click on the Calibrate button.
Set the Z min slider to zero because using the 3D Printing ToolHead we don't need to go beyond that point.
Click on the Set Program Zero button to set the current location as the program zero.
Click again on the Calibrate button to hide the calibration controls.
Then home the platform.
Now, click on the Go to Zero button to check that the platform goes to that position. The platform will stop just when the hot-end tip almost touches the glass.
Feeding the extruder
Now we are going to feed the extruder with the plastic filament. TwinTeeth uses 1.75mm PLA filament by default but you can use any extruder and any filament with little modifications.
To feed the extruder first you need to heat the hot-end.
Set the heater control to 185 degrees and click on the Set button. Wait a moment and then press on the Check button. You have to see how the temperature is rising from the ambient temperature to the 185 degrees.
Now that the hot-end is really hot you can feed the plastic filament in the extruder.
Open the extruder idler and insert the filament in the hole till it will reach the hot-end tip. You will see that the nozzle will start to extrude some melted plastic when you push on the filament.

Then close the idler and tighten the spring bolts till the idler compresses the filament with the bearing. Try to move the idler pushing with your fingers. If it's difficult to move then it is ok.
Go again to the extruder control area.
Now we are going to purge a little the extruder using the extruder controls.
Click on the Home button.
Click on the Check button to be sure that the hot-end is still hot and above 185 degrees.
Now select 3mm in the dispensing length slider and 200mm/min at the rate slider. Then click on the down arrow to extrude the filament.
Preparing the printing platform
Now we are going to prepare and install the printing platform.
Spray on it a little amount of window cleaner and clean it using a paper towel. It is very important to clean well the glass to avoid plastic adhesion issues. This is far away the most important issue when 3D printing. If the plastic does not adhere well to the printing glass then it could detach from it at the middle of the printing. You will find at 3D printing forums some tips to create a good adhesion surface using Kapton tape, blue masking paper tape, hair spray, etc. We use hair spray because it is cheap and works really well.
Install the printing glass on the platform and spray a little hair spray on it. Let it dry before printing.
The 3D printing ToolHead is ready to print!
3D printing the part
In this section we are going to print the part.
Set the hot-end temperature to 190ºC. PLA filament melt at 185-220°C around 190°C is a good start.
Then Click on the Load File button and load the g-code file. You will see a representation of the object loaded at the Simulation Area.
Then click on the Run Button to execute the job.
The robot will start to 3D print. You will see the evolution of the job at the simulation area.
When the job is finish the platform will move to the home position.
The part is ready!
This is the last chapter of this tutorial.
Thanks very much for your attention!
Previous chapter Use it Index Home
